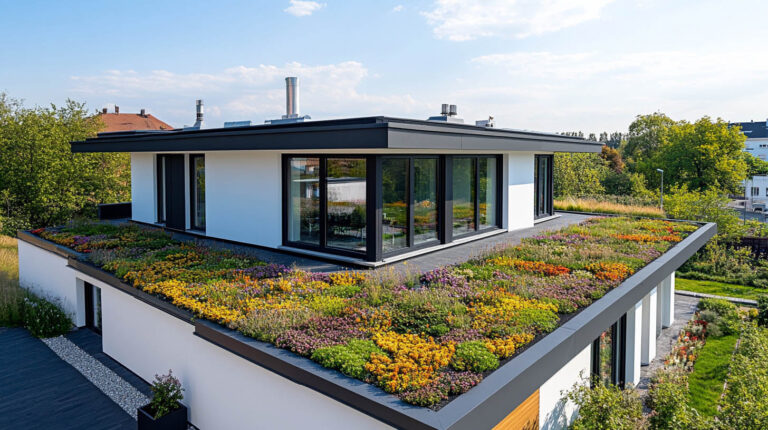


A roof terrace is one of the most appealing ideas and one of the most demanding technically. The reason is simple: the waterproofing stops being the top layer. It ends up beneath a surface that has to come off every time anyone needs to look at it. This article covers what a roof terrace is made of, how water drains on two levels, why the door threshold is the hardest detail and what balustrades are fixed to.
What a usable roof is
A roof first, a terrace second
Under the handsome paving sits a full roof covering. If it lets water through, the problem is under the whole terrace build-up — so a usable roof is designed as a roof, not as a floor.
A roof counts as usable when it is in regular use rather than walked on only for maintenance. A terrace, a courtyard over a garage, an amenity area, sometimes parking.
The difference from an ordinary roof is not only load. It is fundamental:
- A protection and wearing layer appears above the waterproofing.
- Water runs on two levels — across the surface, and beneath it at membrane level.
- Any inspection or repair means lifting the surface.
- Details appear that an ordinary roof does not have: thresholds, balustrades, steps.
A usable roof is therefore designed as a whole from the outset. Turning an ordinary roof into a terrace “later” almost always means opening it down to the structure.
One case is worth separating out, because it often gets confused. A roof walked on twice a year to clear the outlets is not a usable roof — walkway pads or simply a robust covering will do. It becomes usable when furniture is placed on it, people spend time there and things are stored.
The distinction matters, because the cost of the two solutions differs by a multiple. Before starting it is worth answering precisely how often and for what the roof will be used.
2
drainage levels: at the surface and at the waterproofing
1
the hardest detail: the door threshold
0
room for error in the covering under the paving
The layers: what sits under the paving
An inverted build-up is normally used — the same one described in our green roof article. From the bottom up:
- The structural deck with the fall formed in it.
- Waterproofing. Here it acts both as vapour barrier and as the primary seal.
- Thermal insulation. Necessarily non-absorbent and of high compressive strength.
- Protection and drainage layer. It takes water away at membrane level.
- Pedestals or a granular bed.
- The wearing surface — paving, timber or composite decking, gravel.
The critical property in that stack is compressive strength. On a terrace the loading is concentrated: furniture feet, pedestals, people. Insulation that is too soft settles, the surface goes uneven, and water stands in the hollows.
Adjustable pedestals: the standard solution
How much will your roof cost?
Enter the roof area and covering type to get an indicative price in a minute. Or call us for an instant answer.
- Free on-site inspection
- Reply within 48 hours
- Warranty up to 20 years
Paving on a roof is today almost never bedded in mortar but laid on adjustable pedestals. It changed terrace construction fundamentally.
How it works: each pedestal adjusts for height, so a level surface is achieved over a roof that has a fall. The fall stays below and does its job, while the surface underfoot is flat.
What that delivers:
- Water runs under the paving rather than across it. The surface dries quickly and no puddles form.
- Air moves beneath the surface — the layer stays dry and timber decking lasts longer.
- A slab can be lifted by hand. Inspecting the waterproofing requires no demolition.
- Services hide beneath the surface — lighting cables, irrigation lines.
That last point matters more than it appears. A terrace bedded in adhesive is a one-way decision: a leak means breaking it up. A terrace on pedestals can be dismantled at any time.
There are also a few things pedestals do not take care of by themselves, and which are worth asking about:
- Pedestal heads must not bear directly on the waterproofing. Protection pads go beneath them so the point load cannot damage the membrane.
- Slab thickness has to match the pedestal spacing. A slab too thin for the spacing cracks, usually at a corner.
- Perimeter rows need their own solution. Against the parapet a slab is supported on only three sides, so special pedestals or an edge trim are used.
These are details that good work takes for granted and cheap work leaves out. The result shows after about two years.
| Trait | On adjustable pedestals | On substrate / bonded |
|---|---|---|
| Access to the covering | Easy — the pavers lift off | Hard |
| Height adjustment | Precise | Limited |
| Drainage | Under the pavers, two levels | Surface only |
Two-level drainage
Here lies the most common design error, and it is not an obvious one.
On a usable roof water ends up at two levels: some runs across the surface, and some passes between the slabs and travels lower down, at the waterproofing.
If the outlet only collects surface water, the lower level has no drainage at all. Water accumulates under the surface, the insulation stays permanently damp, and in winter ice forms there and lifts the paving.
So two-level outlets are used: they accept water from the surface and from membrane level. The practical requirements:
- The outlet must stay accessible — a removable grating or inspection cover goes over it.
- The lower opening must not be covered by geotextile in a way that lets it silt up.
- Overflow provision is just as mandatory as on an ordinary roof.
Drainage in general is covered in our separate article.
The door threshold: the hardest detail
The door threshold — the hardest detail
This is where the terrace surface meets a habitable room, and the height allowance is often too small. A threshold set too low means heavy rain or melting snow can get inside — this detail has to be planned in from the start.
Two requirements collide here, and they contradict each other.
The waterproofing wants an upstand. The membrane has to be carried up the vertical face far enough that water, snow or meltwater cannot get past it.
Use wants a level transition. A high threshold is a nuisance, and if the terrace must be step-free, it cannot exist at all.
The answer is not to abandon one of them. The answer is a drainage channel in front of the door:
- A grated channel runs across the full width of the doorway, in front of the threshold.
- It intercepts water that would otherwise pool at the threshold and takes it into the system.
- Because of that the upstand can be lower and the transition almost level.
- In cold climates the channel is sometimes trace-heated so it does not freeze.
Without the channel, a low threshold ends in water indoors sooner or later — usually the first time it rains hard with wind behind it, or in spring when accumulated snow melts.
Height: how much the build-up eats
Tied to the threshold is another constraint that appears early in design and often surprises.
A terrace build-up is not thin. Insulation, drainage layer, pedestals and the surface itself add up to a substantial height. The door threshold, meanwhile, is fixed — it was set when the building went up and does not move afterwards.
From which follows the key point: the available build-up thickness is set from the top down, not the bottom up. The height between deck and threshold is a budget to be divided among all the layers.
What that means in practice:
- Insulation thickness may be constrained. Sometimes a material with better conductivity is chosen purely because it is thinner.
- The fall has to be formed economically. A tapered layer adds height at the high point.
- Pedestals have a minimum height. Below a certain point they no longer adjust.
In refurbishment this is the most common reason a terrace design changes: there is height for the surface or for the insulation, but not for both. So the height check comes first — before any material is chosen.
The same place is also a thermal bridge: at the door the insulation layer is at its thinnest or absent entirely. The threshold detail therefore governs heat as well as water.
Wind and the terrace surface
Loose-laid slabs look safe because of their weight. In practice wind lifts them — and exactly where it is least expected.
The reason is the same as for the roof as a whole: air flowing over the building edge creates lower pressure. It acts most strongly at the corners and along the edges, and the void beneath the paving lets that pressure work from below as well.
What to do:
- Use heavier or restrained slabs at the perimeter. Corner zones are protected first.
- Link the slabs together. There are pedestals with clips that tie slabs into a continuous plane, so no single one can lift.
- Leave a border strip. A band of gravel or fixed units is often formed along the parapet.
- Leave no free edges. A slab with one edge unrestrained is the start of a lever.
The question matters more on tall buildings than low ones, and more on exposed sites than in dense surroundings.
Balustrades: what they are fixed to
A balustrade has to resist a person’s weight and push. That means substantial fixings — and every fixing through the membrane is a penetration.
The options, best first:
- Fixing to the outer face of the parapet. The membrane is not pierced at all.
- A ballasted system. The base is held down by weight, with no penetrations. Suitable where the structure can take the additional load.
- Fixing to the structure with a sealed detail. When nothing else is possible. Every post becomes a detail to be solved individually and maintained afterwards.
What should never be done is fixing a balustrade straight through the waterproofing without a proper detail, hoping sealant will cover it. That is a place where a leak is not a possibility but a certainty after the first winter.
Sound: a terrace above a habitable room
Something considered only once it is too late. Where a bedroom or living room sits below the terrace, impact sound becomes a genuine problem: footsteps on paving, a chair pushed back, something dropped.
Adjustable pedestals have a drawback here — the void beneath the paving acts as a resonator.
What can be done:
- Acoustic pads on the pedestal heads. The simplest measure and inexpensive.
- Thicker, heavier slabs. Mass damps.
- Timber or composite decking instead of ceramic — softer and quieter.
- Acoustic treatment in the structure — the most effective, but only possible at design stage.
Tracing a leak under a terrace
The same problem as on a green roof: the membrane is buried, and water can travel along the drainage layer and appear elsewhere.
It is solved at installation, not after the event:
- Integrity testing before covering. A flood test or equivalent — the only moment when testing is still easy.
- Compartmenting. The drainage layer is divided by upstands so a leak stays within one zone.
- Permanent monitoring. Sensors above the membrane on larger buildings.
A terrace on pedestals is in a far better position than one on adhesive: slabs can be lifted and a large area inspected within an hour. That is one more argument for pedestals.
When a roof terrace is the wrong idea
- The structure cannot take the load. Use load plus surface plus snow — all calculated together.
- The existing membrane is doubtful. Covering it with a terrace means the next leak has to be found under paving.
- No room for the threshold detail. Where the door threshold is already too low and cannot be raised.
- A roof full of plant. Ventilation units and pipework leave little usable area and many details.
- No safe access. A terrace reached only through a hatch goes essentially unused.
Maintenance
- Twice a year the outlets and channels are cleared — at both levels.
- The joints between slabs are cleared of leaves and grit so water can pass down.
- Every few years it is worth lifting a few slabs in different places and inspecting the membrane.
- Timber decking is checked for fixings and treated per the manufacturer’s instructions.
- Balustrade fixings are checked — they carry constant load and temperature cycling.
The most common mistakes
- Single-level drainage. Water beneath the paving has nowhere to go.
- Insulation with inadequate compressive strength. The surface goes uneven within a few years.
- Paving bedded in adhesive. Saved at installation, paid back at the first repair.
- No channel in front of the door. Water enters the building over the threshold.
- Balustrades fixed through the membrane with no detail. A leak after the first winter.
- Covering the membrane without testing it. Later that test costs ten times as much.
- Impact sound not considered. The terrace gets used and the room below becomes unusable.
What drives the cost
- The wearing surface — paving, timber, composite.
- Whether adjustable pedestals are used and how much height they compensate.
- Whether the waterproofing is replaced beforehand.
- Number of details — thresholds, balustrades, steps, penetrations.
- Structural strengthening, where required.
- Whether lighting and irrigation are run beneath the surface.
General pricing is set out in our flat roof cost article.
Planning a roof terrace?
We assess the structure, the existing membrane and the details – and tell you what can realistically be built.
How installation proceeds
Building a roof terrace: 6 stages
Assessing structure and covering
Capacity is checked against use and snow loading, along with the condition of the existing waterproofing and the fall.
Waterproofing and integrity test
The membrane is laid or renewed and details completed. An integrity test is carried out before anything is covered.
Insulation and drainage
Non-absorbent high compressive strength insulation and the drainage layer are laid. Two-level outlets are installed.
The threshold detail
A grated channel is formed in front of the door and connected into the drainage system.
Pedestals and surface
Adjustable pedestals are set to achieve a level plane. Paving or decking is then laid.
Balustrades and finishing
Balustrades are installed by the chosen method and services beneath the surface connected. A final inspection follows.
Related reading
Frequently asked questions
Yes, if the structure carries the use load together with the surface and snow, and the waterproofing is sound. Covering a doubtful membrane is unwise – the next leak would have to be found under paving.
They produce a level surface over a roof that has a fall, and water then runs under the paving rather than across it. A slab can also be lifted by hand to inspect the waterproofing – a terrace bedded in adhesive has to be broken up to repair.
On a usable roof water sits at two levels: some runs across the surface, some passes between the slabs and travels at membrane level. The outlet has to accept both. If only surface water is collected, the lower level has no drainage at all.
With a drainage channel in front of the door. The waterproofing wants an upstand while use wants a level transition; a grated channel intercepts the water, so the upstand can be lower. In cold climates the channel is sometimes heated.
Ideally to the outer face of the parapet, so the membrane is never pierced. The second option is a ballasted system. Fixing through the membrane is used only where nothing else works, and every post then becomes a detail solved individually.
It can be – the void under the paving acts as a resonator, and footsteps and moving furniture are heard below. Acoustic pads on the pedestals, heavier slabs or timber decking all help.