



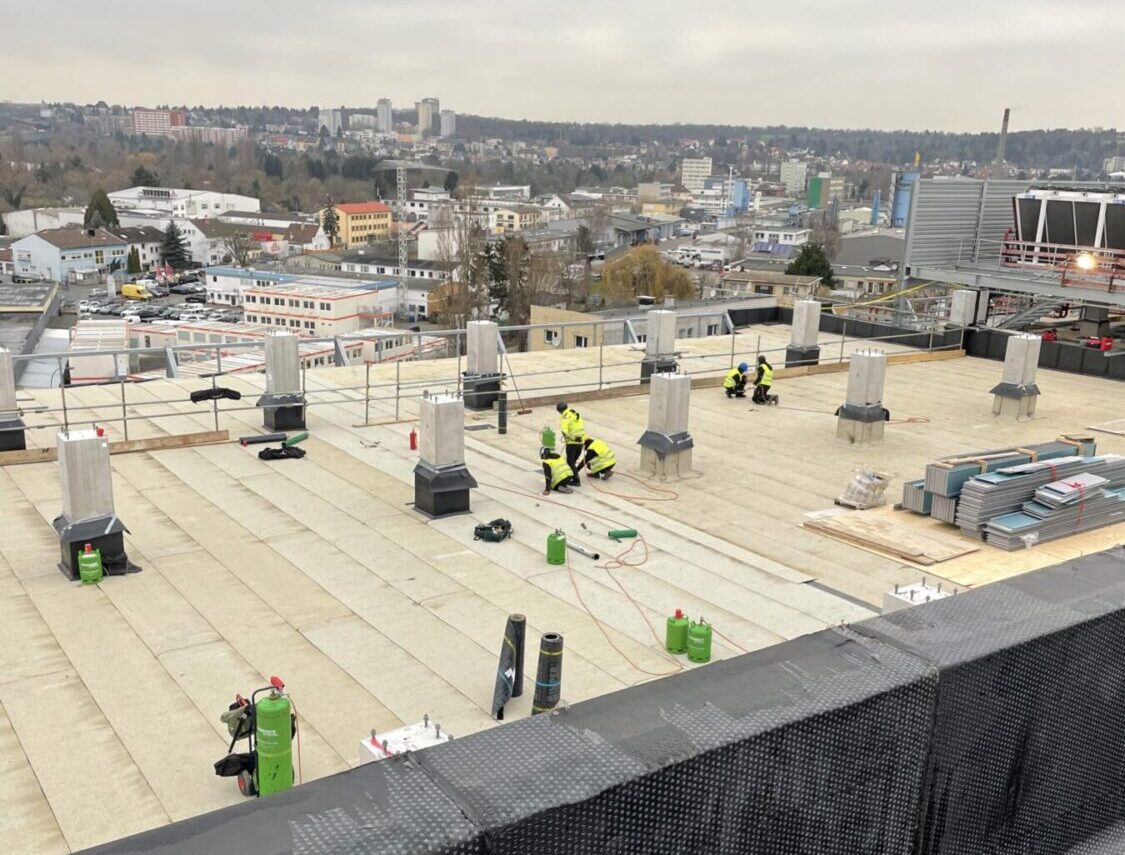
A roof can be insulated from either side, and the choice is not a matter of taste. It determines where the dew point ends up inside the construction — and that decides whether you have a warm roof in five years or saturated insulation. This article covers how external insulation differs from internal, which materials suit, how thickness is set and where the benefit is most often lost.
What external roof insulation means
External insulation means the thermal layer sits above the structural deck — on the slab, beneath the waterproofing. On flat roofs this is the standard solution.
The layer order runs: deck, vapour barrier, insulation, waterproofing. The insulation sits between the vapour barrier and the membrane, and the structure itself stays on the warm side.
The opposite approach is internal insulation, fitted beneath the deck on the room side. It looks simpler and cheaper, but from a building-physics standpoint it carries considerably more risk.
Why external is safer than internal
The difference comes down to one thing: where the dew point ends up.
The dew point is the position in the construction where warm moist air cools enough for vapour to turn to liquid. Insulating externally pushes it into the insulation layer or beyond — the structural deck stays warm and dry.
Insulating internally leaves the deck outside the insulation, on the cold side. It cools down, and moisture that gets through any imperfection condenses there. The result is a damp deck, mould and insulation that stops performing.
| Criterion | External insulation | Internal insulation |
|---|---|---|
| Dew point | In the insulation, safely | In the structure, risky |
| Deck temperature | Warm and stable | Cold, subject to swings |
| Thermal bridges | Fewer | Many — wall junctions, slabs |
| Ceiling height | Unchanged | Reduced |
| Work inside | Not required | Required — finishes, moving out |
| When it suits | Almost always | When outside work is impossible |
Internal insulation is not forbidden — it simply demands more precise calculation and a flawless vapour barrier. Where there is a choice, external is almost always better. We cover the internal approach in a separate article.
4
common external-insulation materials
2
layers with staggered, overlapping joints
0
thermal bridges — the goal of a good design
The common materials
How much will your roof cost?
Enter the roof area and covering type to get an indicative price in a minute. Or call us for an instant answer.
- Free on-site inspection
- Reply within 48 hours
- Warranty up to 20 years
Insulation on a flat roof works under demanding conditions: it must not only insulate but also carry load — the waterproofing rests on it and maintenance staff walk across it.
- Mineral wool. Non-combustible, vapour permeable, good acoustic performance. Roof grades come in higher densities. Heavier than the alternatives and more sensitive to moisture, so a vapour barrier is essential.
- Expanded polystyrene (EPS). Economical, light, good compressive strength. Its fire performance is limited, so it is restricted on commercial buildings. Unsuitable where prolonged water contact is possible.
- Extruded polystyrene (XPS). Absorbs almost no water and has high compressive strength. That is exactly why it is used on inverted and usable roofs, where the insulation sits above the waterproofing.
- Polyisocyanurate (PIR/PUR). The best thermal conductivity of those listed, so a thinner layer achieves the same result. Useful where roof height is constrained.
The choice follows a combination of properties, not one: fire classification, compressive strength, water absorption and thermal conductivity. On commercial buildings fire requirements often decide it; on houses, cost and thickness.
| Material | Properties | Where it fits |
|---|---|---|
| Mineral wool | Non-combustible, vapour-open | Where fire safety and diffusion matter |
| EPS | Light, economical | Large, uniform surfaces |
| XPS | Resistant to moisture and pressure | Inverted roofs, terraces |
| PIR / PUR | Best thermal resistance in less thickness | Where the build-up height is limited |
How thickness is determined
Thickness is not chosen by habit — it is calculated from the required U-value (thermal transmittance). The lower the U-value, the warmer the roof.
Three things drive the calculation:
- Thermal conductivity of the material. Different materials need different thicknesses for the same result.
- Building use. Requirements differ between heated residential and ancillary buildings.
- Energy performance class. A higher class means a lower permitted U-value, and therefore a thicker layer.
A practical note: added thickness gives diminishing returns. The first centimetres cut heat loss sharply; each subsequent one adds less. Beyond a point it is cheaper to invest in detail quality than in more thickness.
Why insulation is laid in two layers
Thicker insulation is often installed not as one board but as two layers with staggered joints.
The reason is simple: however precisely you lay them, joints remain between boards. In a single layer those joints run through the full thickness and form a continuous thermal bridge. In two layers the upper joints cover the lower ones, and no continuous path is left.
The same principle as bonding brickwork. The added benefit is less air movement between boards and a more even surface for the waterproofing.
How the insulation is held down
A flat roof is subject to wind uplift — air flowing over the roof creates lower pressure and pulls the build-up upwards. The insulation therefore has to be secured, not merely laid.
Three methods are used:
- Mechanical fixing. Fasteners with plates pass through the insulation into the deck. The most reliable and most common solution, especially on profiled steel. The drawback is that every fastener is a point thermal bridge and a penetration through the vapour barrier.
- Adhesion. Boards are bonded to the deck with bitumen or polyurethane adhesive. No penetrations remain, so it suits cases where vapour barrier continuity matters or noise during work is restricted.
- Ballast. The build-up is held down by gravel or pavers. Used on inverted and usable roofs, but it requires a structure able to carry the extra weight.
An important detail: fixing density is not uniform across the roof. Wind load is highest at the corners, lower at the perimeter and lowest in the field. Corner zones are therefore fixed more densely. Uniform density everywhere means either the corners are underfixed or the field is overpaid for.
Forming the fall with insulation
On a flat roof insulation often performs a second job — forming the fall.
Tapered boards of varying thickness are used, arranged into a scheme that directs water towards the outlets. One operation delivers both insulation and direction.
This is cheaper and easier than forming a fall in concrete or screed, and far lighter on the structure. In refurbishment it is often the only realistic way to correct the fall, because an older building may not take the weight of a screed.
One nuance worth noting: where the tapered boards are thinnest — usually at the outlets — the insulation layer is thinnest too. The U-value is therefore calculated on the average rather than the maximum thickness, and enough insulation must remain at the thinnest point so that no cold zone forms around the outlet.
Work out the required rise with our slope calculator.
The inverted roof: insulation on top
On an inverted roof the order is reversed: the insulation sits above the waterproofing, with ballast on top — gravel, concrete pavers or green roof substrate.
Advantages:
- The waterproofing is protected from UV, temperature swings and mechanical damage, so its service life extends.
- No separate vapour barrier is needed, because the waterproofing performs that role.
Constraints:
- Requires non-absorbent material — in practice extruded polystyrene.
- Ballast adds weight the structure must carry.
- Leaks are harder to trace, because the membrane is buried.
Inverted build-ups are common on usable roofs — terraces and green roofs, where a protective layer above the membrane is needed anyway.
Thermal bridges: where the benefit is lost
Where thermal bridges usually appear
At parapets, drains, small stacks and fixings. Even on a well-insulated roof these spots can eat up part of the benefit if they are not thought through in the design — so the details matter more than the overall thickness.
Thickness alone guarantees nothing. Heat finds a path wherever insulation is absent or interrupted.
The common thermal bridges on a flat roof:
- Mechanical fixings. Every fastener passes through the full insulation thickness. Their number and type should be calculated, not chosen “with a margin”.
- Parapets. If the insulation stops at the parapet base, heat escapes through the concrete upstand. So the parapet is insulated on its inner face, or the insulation is carried up it.
- Penetrations. Vents, chimneys, cables — every opening interrupts the layer.
- Board joints. Poorly closed or unstaggered joints create a direct path.
The practical conclusion: detailing matters as much as thickness. A roof with thick insulation and poor details can lose a large share of the intended benefit.
How to check whether the existing roof is still warm
Before planning the work it pays to assess what you already have. There are several methods, from the simplest to the most precise.
- Watch the snow. A free thermal camera. If snow melts unevenly — bare patches in places while a layer holds nearby — heat is escaping under the bare patches. If all the snow disappears within a day, there is effectively no insulation.
- Ice at parapets and outlets. A sign that heat is escaping through the details: meltwater reaches the cold edge and freezes there.
- Ceiling temperature. If top floor ceilings feel colder than the walls and condensation forms on them in winter, the layer is too thin or wet.
- Thermography. The precise method. Surveyed from inside in winter, with a temperature difference present. It shows not only poorly insulated zones but also saturated areas — wet insulation conducts heat differently from dry.
- Core sample. The definitive check: a small area of the covering is cut open and the layers inspected. The only way to know exactly what is in the roof and at what thickness.
In refurbishment a core sample is effectively mandatory. Without one the decision is guesswork, and the cost difference between “add a layer” and “strip everything” runs to several times over.
Refurbishment: external insulation over an old roof
In refurbishment external insulation is often the most convenient solution, because the work happens outside and the interior is untouched.
But one question must be answered before starting: is the existing insulation dry?
- If dry — a new layer can go directly over it. Stripping and disposal are saved, and the missing fall can be formed at the same time.
- If wet in places — affected zones are replaced and the rest left. Thermography is used to identify the zones.
- If wet throughout — the whole build-up is stripped. A new layer over a wet one solves nothing; it only seals the problem in.
The second check is whether the structure can carry the extra weight, and whether an existing vapour barrier is present at all. Older roofs often have none — in which case new insulation will saturate exactly as the old one did.
Insulation and solar panels
Solar arrays on flat roofs are increasingly common. That has a direct bearing on the insulation, and it is better considered before the work than after.
Mounting frames impose a point load. It bears not on the deck but on the insulation — so the material under the feet needs sufficient compressive strength, or load-spreading pads. Insulation that is too soft settles under the supports, and hollows form where water then stands.
The second issue is the fixing method. Ballasted systems do not pierce the membrane but add weight. Penetrating systems go through the whole build-up, and every point becomes a detail that must be sealed.
The practical conclusion: if an array is even loosely planned, say so while the insulation is being designed. Changing the insulation type under the supports later means opening the roof.
What it delivers in practice
- Lower heating costs. The direct and most visible effect.
- More stable temperatures in summer. Insulation works both ways — top floors overheat less.
- Lower condensation risk. The dew point moves out of the structure.
- Longer structural life. The deck no longer experiences temperature swings.
- Better energy performance rating. Relevant when selling or letting the building.
The most common mistakes
- Insulating with no vapour barrier, or a damaged one. Moisture enters the new layer and it stops performing.
- Aligned board joints. A continuous thermal bridge through the full thickness.
- Insufficient compressive strength. The insulation settles, hollows form and water stands in them.
- Parapets left uninsulated. Heat escapes through the upstand and ice builds there in winter.
- New layer over wet old insulation. The problem is sealed in rather than solved.
- Additional load not assessed. Especially relevant when refurbishing older buildings.
- Fall left as it was. A missed opportunity to correct ponding in the same operation.
What drives the cost
- Material and thickness — the single largest factor.
- Whether the boards form the fall — tapered costs more than flat.
- Whether the old layer must be stripped.
- Number of details — parapets and penetrations need their own solutions.
- Access — height, vehicle access, whether the building stays in use.
The cost structure is broken down further in our flat roof cost article.
Planning roof insulation?
We assess the existing build-up and tell you what thickness and material are genuinely needed.
How the work proceeds
External roof insulation: 6 steps
Condition assessment
Existing insulation, structural capacity, the fall and whether a working vapour barrier is present are all checked.
Selecting thickness and material
Material and layer thickness follow from the required U-value, fire requirements and compressive strength.
Substrate preparation
The surface is cleaned, friable areas removed and, where necessary, saturated old insulation stripped.
Vapour barrier
The vapour barrier is laid or renewed with sealed laps and carried up vertical surfaces to the top of the insulation.
Installing the insulation
Boards are laid with staggered joints, in two layers where required. The fall is formed with tapered boards.
Waterproofing and details
The covering is laid, parapets and penetrations completed with thermal-bridge solutions, and testing carried out.
Related reading
Frequently asked questions
Because it pushes the dew point into the insulation layer, leaving the structural deck warm and dry. Insulating internally leaves the deck on the cold side, and moisture condenses there instead.
There is no single answer — the choice follows fire classification, compressive strength, water absorption and thermal conductivity. Fire requirements often decide it on commercial buildings, water absorption on inverted roofs, and conductivity where height is constrained.
So that board joints do not align. In a single layer the joints run through the full thickness and form a continuous thermal bridge. In two layers the upper joints cover the lower ones, leaving no continuous path for heat.
Yes, if the old layer is dry and sound — that saves stripping and lets the missing fall be formed at the same time. If the old layer is wet, a new one solves nothing: the problem simply stays sealed inside.
Up to a point. The first centimetres cut losses sharply; each subsequent one adds less. Beyond a certain thickness it is cheaper to invest in detail quality and eliminating thermal bridges than in more material.
Yes. If the insulation stops at the parapet base, heat escapes through the concrete upstand and ice builds there in winter. The parapet is insulated on its inner face, or the insulation is carried up it.


